Introduction
Want to integrate forward curve data directly into your financial model? 🚀 The BlueGamma Excel Add-In makes it simple. With real-time data and easy-to-use formulas, you can save time and focus on what matters. Let’s walk through the process!
Step 1: Install the BlueGamma Excel Add-In
- Visit the Microsoft AppSource Store.
- Click Get It Now and follow the prompts to install the add-in in Excel
Step 2: Activate Your BlueGamma Account
After installation, email us at support@bluegamma.io to activate your trial. Once activated:
- Open Excel.
- Navigate to the BlueGamma tab in the toolbar
Step 3: Log In
- Click Sign In under the BlueGamma tab and enter your account credentials.
- If you don’t have an account, contact us for setup.

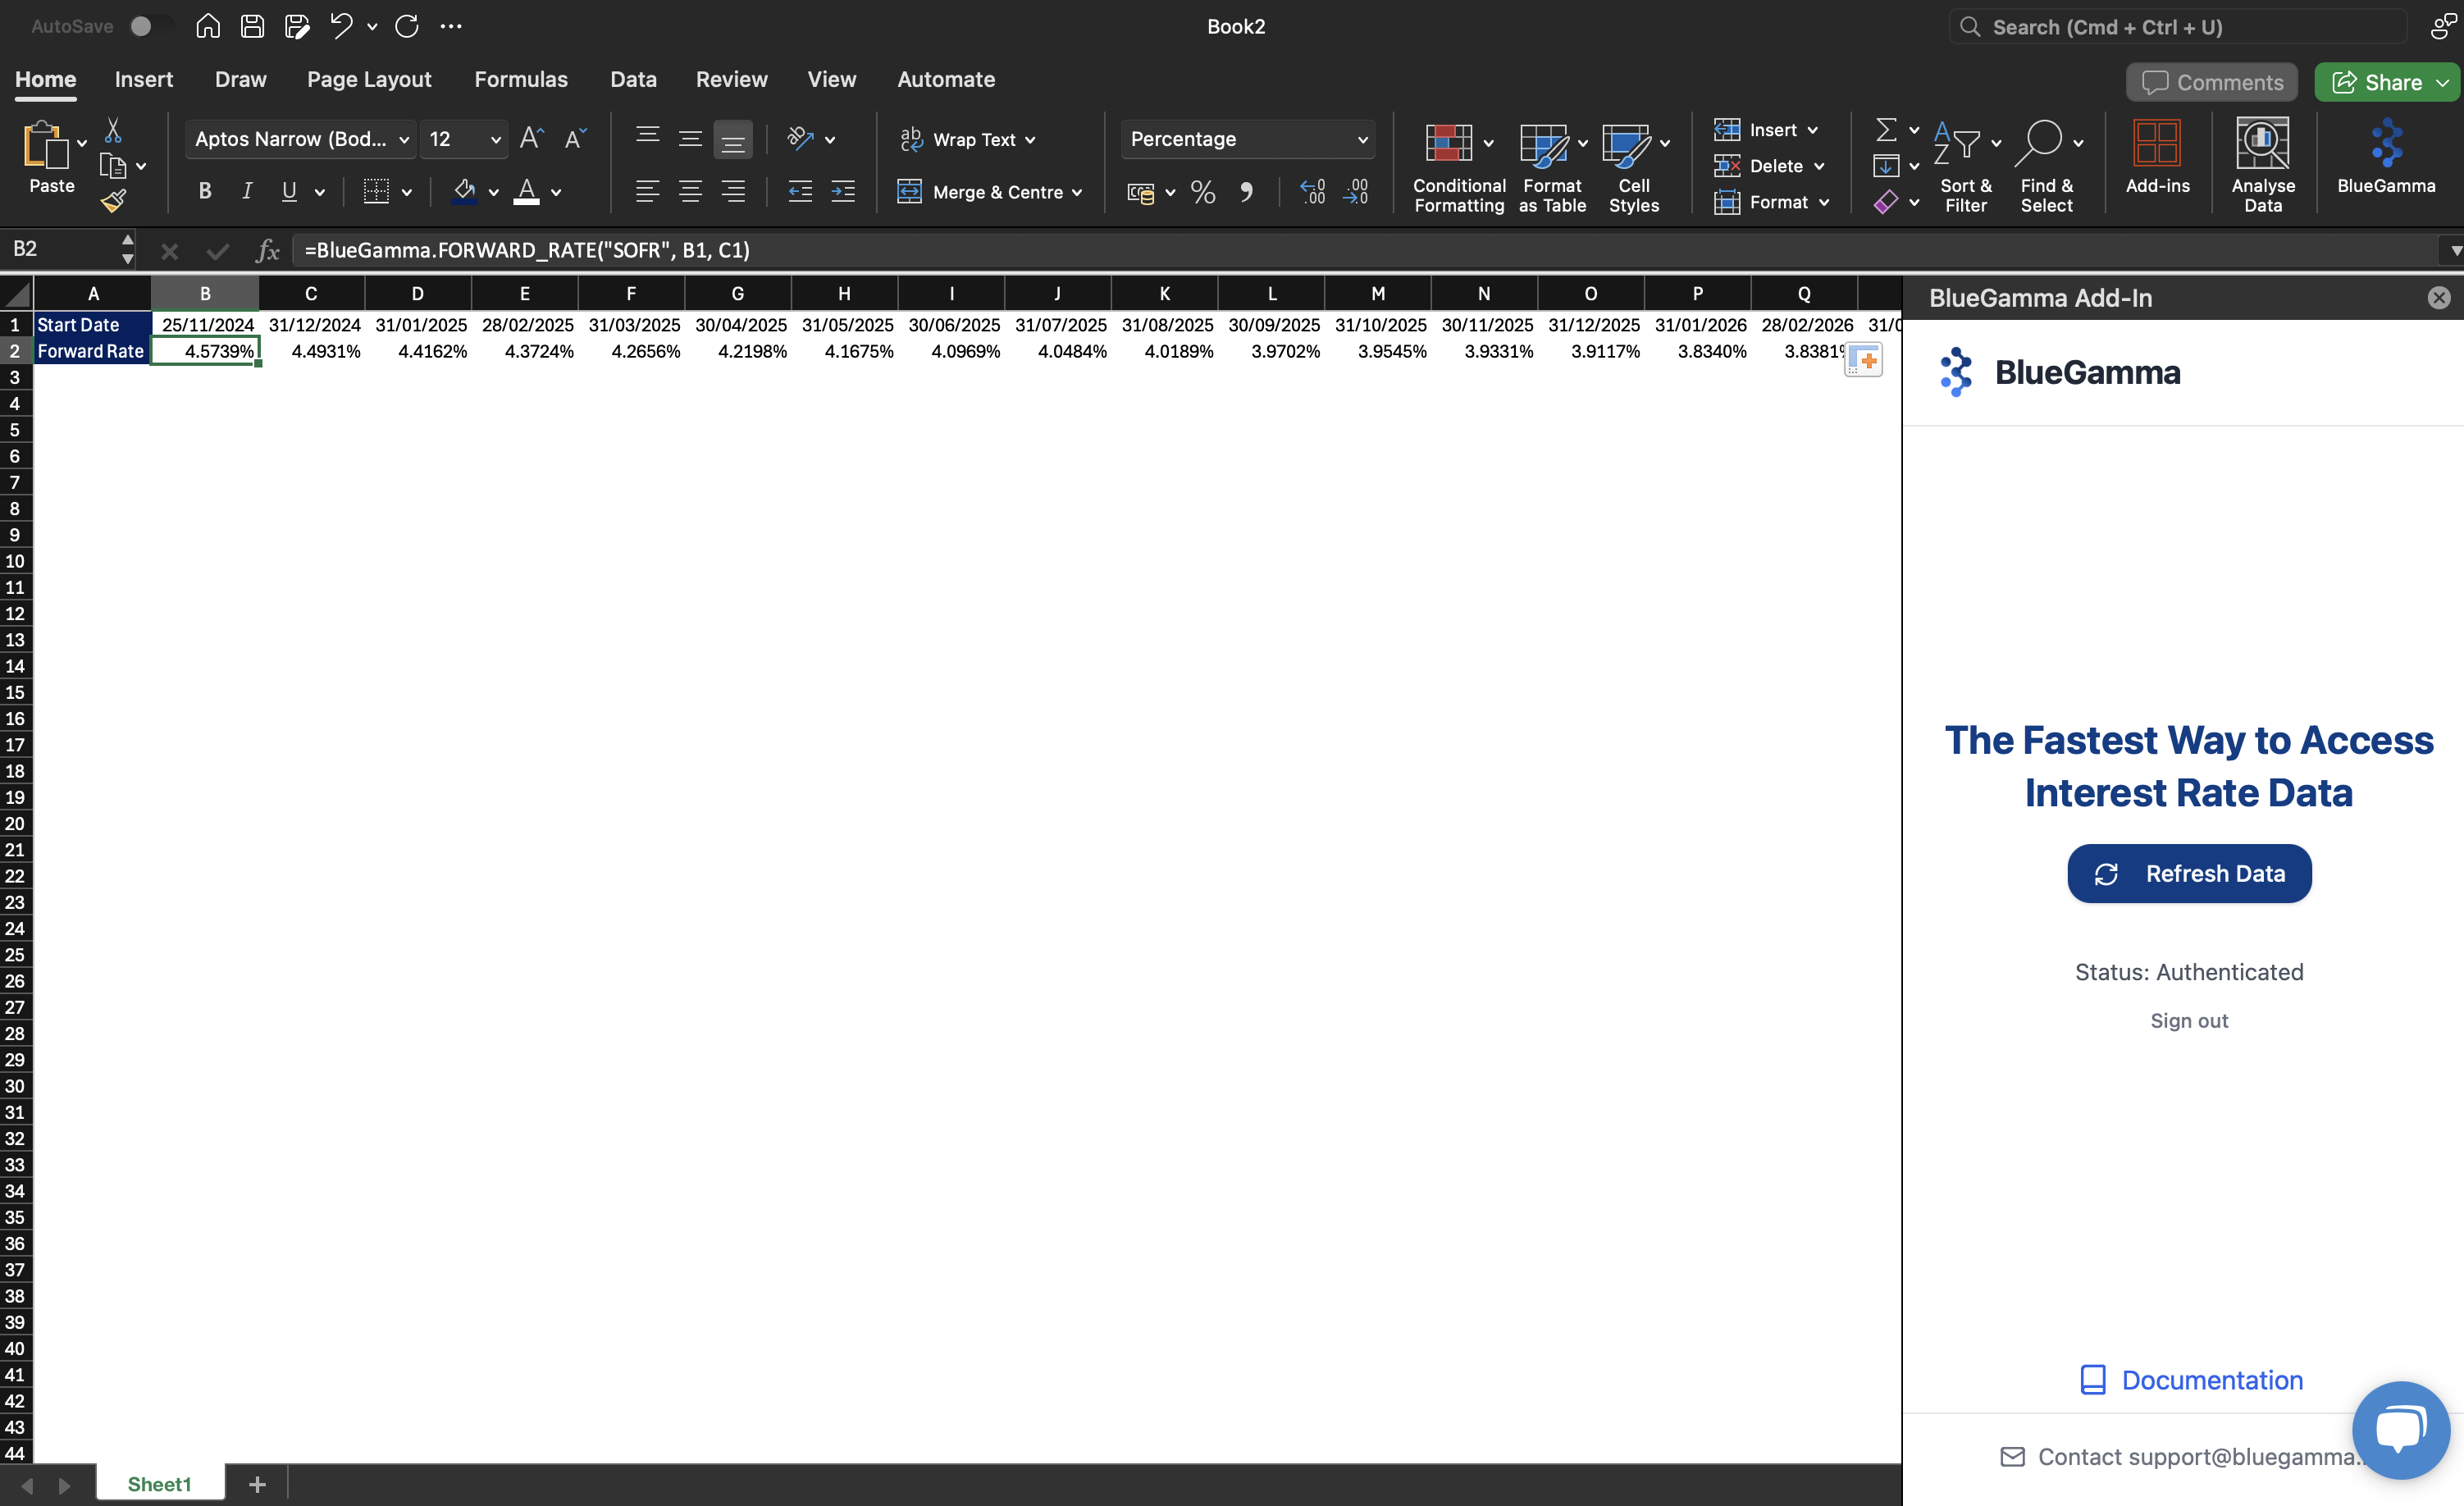
Step 4: Use the =BlueGamma.FORWARD_RATE Function
To pull forward curve data, use the =BlueGamma.FORWARD_RATE function in a cell. Here’s how:
- Select the cell where you want the forward rate data to appear.
- Enter the formula with these parameters:
index: The financial index, e.g.,"SOFR"or"1M EURIBOR".start_date: The start date for the curve, e.g.,"2024-01-01".end_date: The end date for the curve, e.g.,"2024-12-31" or a period eg '3M'
=BlueGamma.FORWARD_RATE("SOFR", "2025-09-30", "2025-12-31")

Example Usage in Financial Models
Want to create a dynamic forward curve table? Use Excel's autofill feature to extend the formula across rows for different dates.
=BlueGamma.FORWARD_RATE("SOFR", B1, C1)

Need Help?
We’re here to support you!
- Contact us via chat or email support@bluegamma.io.
- Check out our YouTube Tutorial for a video walkthrough.
📥 Download the BlueGamma Excel Add-In today and simplify your financial modeling workflows!